
Our gardens may seem to be sleeping for the winter but hardy kales have been flourishing in the protection of our cold frame.
Installing a cold frame in your garden is the perfect way to extend your season and harvest fresh, healthy greens year round.
However, we do recognize that eating the same kale salad or stir fry can get old. Read to the end for a way to mix things up, courtesy of Deanna, creator of an incredible urban homesteading blog called Homestead and Chill.
Deanna may be in sunny California (actually her microclimate is very foggy, but she rarely has to deal with freezing temps!) but her garden can serve as inspiration to us all.
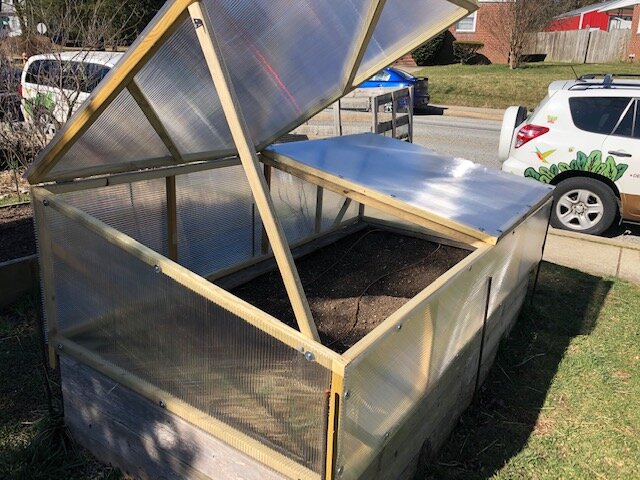
One of Edible Eden’s custom-built coldframes.
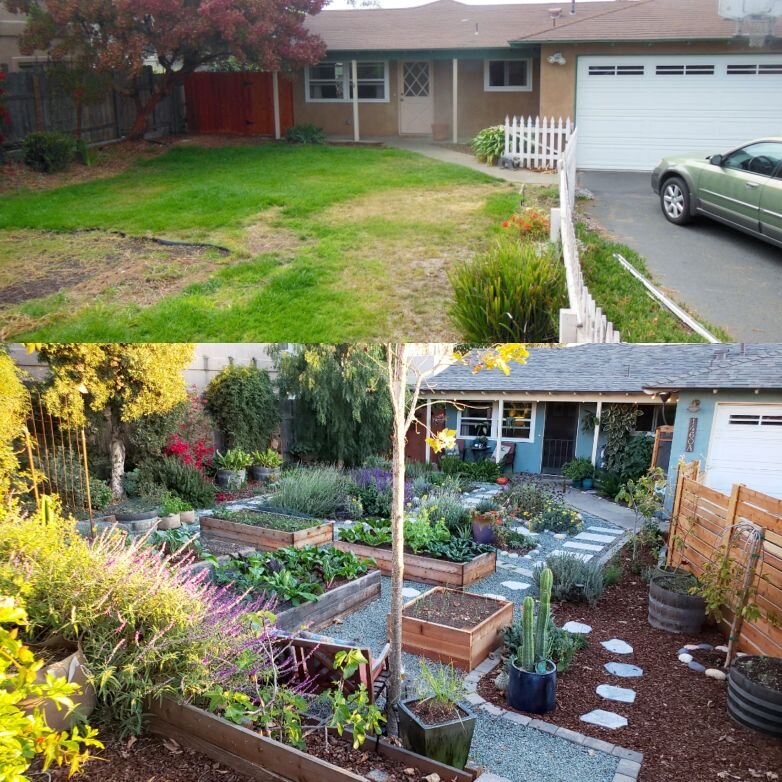
The Homestead and Chill front garden. Check out Deanna’s work on Instagram at @deannacat3 and her blog at homesteadandchill.com .
Check out this before and after photo of her front yard and click the image to see more - you’re definitely going to want to check out her full scope of raised beds, fruit trees, and pollinator gardens!
Go for the inspiring photos, but stick around for the recipes, gardening tips, and useful product recommendations.
Speaking of sticking around, thank you for sticking with me through that digression. Back to kale.
Kale is hardy down to temps of 20°F and even tastes sweeter after a frost; that’s thanks to the plant producing sucrose to act as a natural protective antifreeze.
Despite their frost tolerance, kale needs an extra boost of protection to succeed through our winters.
Our temps here in Baltimore usually do drop below 20°F at some point during the winter, although our recent winters have been fairly mild. A cold frame is an extra layer of protection to keep your plants alive during a deep freeze, but it also serves as more than just an insurance policy for the coldest of days.
Kale prefer to grow at temperatures between 50-70°F. In lower temperatures, they go dormant and wait for better conditions to grow. A cold frame can raise temperatures by about 10°F, keeping your kale growing longer in Fall and waking up more quickly in late Winter or Spring!
Your kale will likely still go through a dormancy in the dead of winter, but extending their growth through late Fall/early Winter will allow your plants to grow full enough that you can continue harvesting the existing large leaves until the plants wake up again soon in Late Winter or Early Spring.
Deanna’s recipe below is the perfect (and most delicious) use for mature tougher leaves.

One of Edible Eden’s custom-built coldframes.
Homemade Seasoned Crispy Kale Chips Recipe by Deanna of Homestead and Chill
You’re going to want to check out the full instructions on her blog through the link above for full instructions on how to use your food dehydrator or oven, but here is the ingredient list to get you started:
1 large bunch of kale, or about a dozen large leaves
1/2 to 1 full tablespoon of extra virgin olive oil for drizzling
Sea salt or your favorite seasoned salt, to your own taste
Deanna uses a number of different seasons to keep things interesting, including garlic powder, onion powder, curry or turmeric powder, black pepper, cumin, lemon powder, chili powder, everything-but-the-bagel seasoning, and nutritional yeast for a splash of umami flavor.
A strainer and mixing bowl, or a salad spinner
A food dehydrator, or oven and baking sheet

Deanna’s photo of her Homemade Crispy Kale Chips.