

Nitrogen fixation is the process of pulling atmospheric Nitrogen into the soil to make it accessible for plants. Legumes and a handful of other plants have evolved complex symbiotic relationships with Rhizobium bacteria that live in the soil. The bacteria live in nodules on the roots of these plants. The plants send sugars down to the bacteria and the bacteria use the energy from these sugars to fix Nitrogen into the soil around their host plant.
Read moreRefreshing Summer Drinks
Staying hydrated and refreshed in the midst of the August heat can be a chore. While an ice cold soda may quench your thirst initially, it’s ultimately dehydrating and chock full of sugar. Meanwhile, drinking enough water to replenish oneself (especially when you spend a lot of time outside like we do!) can be daunting. This month we’ll give you some ideas for healthy, hydrating, and refreshing options straight from your garden.
Read moreSeasonal Recipe: Gazpacho
Summer in Baltimore: the sun is out, your garden is full of produce, the heat and humidity weigh on you ‘til you can barely stand up! It’s hard to think about cooking at all when it’s so hot, let alone turning the oven on!
Lucky for you, this month we have the easiest, most refreshing, heat-free recipe possible - AND it showcases all of your favorite Summer veggies!
Composting
Did you know that food waste accounts for 38% of global methane production? Methane is a greenhouse gas that is more damaging to the environment than CO2. Cutting down on food waste could be as effective in fighting climate change as cutting down on driving cars.
Read moreGarden Pests and Garden Pals: Part 1
While we want to create healthy ecosystems that attract beneficial insects, it can be difficult to recognize which bugs we want to get rid of and which we want to keep around! Here’s a quick guide of a few of the most common pests and beneficial insects that we see.
Read moreGardening with kids

Between our family garden coach sessions and our lovely garden at St. Paul’s school, we have the great joy and privilege to help introduce a lot of children to gardening. Part of the reason we do what we do is to change the culture around eating, gardening, and living sustainably. Teaching children to find vegetables delicious creates a generation that supports local farms and promotes healthy eating. Teaching children to find bugs fascinating rather than gross creates a generation that celebrates biodiversity in their yards rather than squashing it. Teaching children to treasure habitats creates a generation of native plant advocates.
Not only do we consider education (of both children and adults alike) a huge part of our mission, working with kids can just be so darn fun. They’re open to discovery, they ask some of the best questions, and they really test our knowledge and communication abilities.
That being said, we know it isn’t always easy getting your garden bed weeded while making sure the kids are happy, safe, and engaged. Here are some tips we’ve found useful for gardening with kids!
Outline clear rules - To avoid the frustration of trampled arugula or snapped tomato stems, set clear rules and expectations about where is safe to walk and what is safe to touch. Use different mulches for the rows and beds of your garden to make the walkways extra clear.
Give ownership - Assign kids their own tasks to complete or plants to care for. Watching their own sunflower grow tall and bloom after daily watering will be rewarding and will teach children not only about plant growth but about responsibility!
Short but focused tasks - Different kids have different attention spans. Instead of asking children to seed four straight lines of perfectly spaced beets, let them broadcast wildflower seeds in an empty part of the garden. Keep tasks short, clear, and focused, and have a checklist of other tasks to fall back on when your garden helper loses interest.
Balance work and play - Although you may have 5 pressing garden tasks that you expect to finish today, your kids may have other plans. Make garden chores into games or reward hard work with play. One great example of this we see is how eager the students at St. Paul’s School are to weed as long as they get to feed the weeds to the chickens!
Enjoy garden snacks - This one may seem obvious, but introduce your kids to the joys of eating garden fresh food. Make sure to plant kid friendly treats around the garden that are easy to pick and eat on the spot. Some of our favorites are peas, strawberries, raspberries, carrots, and cherry tomatoes.
What are your favorite tips for gardening with kids?
Garlic Scapes

It’s been over 6 months since you’ve put your garlic in the ground. Maybe you’re tired of the patch of straw reserved for garlic that could be full of tomatoes right now. Don’t get discouraged!
Just about now, your garlic will form scapes - what is a garlic scape and why should you be excited? A garlic scape is the long, curly shoot sent from the top of the garlic leaves to hold the garlic flower. For our purposes, we want to cut the garlic scapes before they flower. This helps the plant redirect energy to forming a bulb rather than forming a flower and seeds. But that’s not the only reason we pluck off the scapes -- they’re delicious! Enjoy their garlic-y flavor raw, cooked, pickled, or grilled. Really, they’re delicious in anything.
Need some garlic scape inspiration? Try these:
Grilled or Roasted Scapes
One of the simplest and purest ways to enjoy garlic scapes is simply tossing them in olive oil, sea salt, and fresh pepper and throwing them on the grill or in a 400 degree oven until golden brown on the outside and just tender on the inside. Be sure to flip them halfway through to cook both sides. The garlic flavor is mild, sweet, and tangy - the perfect side for your Summer barbecues.
Sauteed Scapes with Lemon
Looking for something slightly more refined? Cut the scapes into 2 inch spears and toss into a pan over medium heat with a pat of butter. Sautee until bright green and just tender, add a splash of water (2 tablespoons or so should do) and cover the pan with a lid. Cook for another 2 minutes. Remove from heat, top with sea salt, fresh pepper, and a squeeze of lemon. Serve with fish or on top of rice.
Garlic Scape Pesto
Feeling like a garlic scape pro? Try making pesto to slather on your pasta or chicken.
You’ll need:
1 cup garlic scapes, sliced crosswise (about 10 to 12 scapes)
¼ cup raw sunflower seeds, pine nuts, or walnuts
½ cup extra virgin olive oil
¼ cup Parmesan cheese
½ cup basil leaves
Juice of one lemon
Pulse the garlic scapes in a food processor for 15 seconds. Add ingredients in order, processing for another 15-30 seconds after adding each. Once everything has been added, process until pesto reaches desired consistency. If it’s too thick, add more olive oil. Add salt and additional lemon juice to taste.
Spotlight on Comfrey
Long grown for its medicinal uses, Comfrey is a favorite among herbalists and permaculture gardeners alike. Traditionally, Comfrey is used as a healing herb to be rubbed raw or as a salve onto rashes, lesions, sore joints, and broken bones. But to gardeners, comfrey is also celebrated as an effective Dynamic Accumulator.
Dynamic Accumulators are plants that send down deep roots that access and collect nutrients too deep for many other plants. As a consequence of its deep tap root Comfrey leaves are rich in nutrients which can be shared with other plants in the garden.
One way to take advantage of Comfrey’s high nutrient yield is by using it as a “green mulch.” Comfrey is a hardy perennial that can easily return after being cut down. Chop down your comfrey leaves with a machete or a weed wacker and spread the resulting leaves around perennial gardens, veggie gardens, or fruit trees. Not only will this serve the purpose of a traditional mulch - keeping moisture in and shading out weeds - it will provide a slow release of nutrients and organic matter as the leaves begin to decompose.
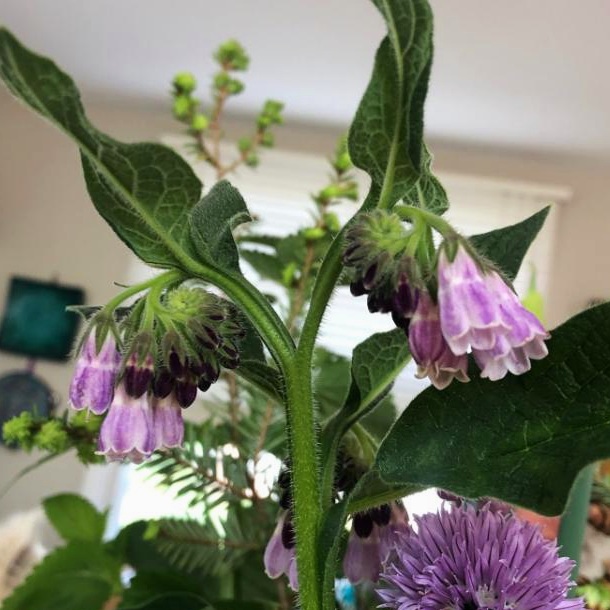
Comfrey flowers are beautiful and great for pollinators, too!
Garden Transitions: Bolting

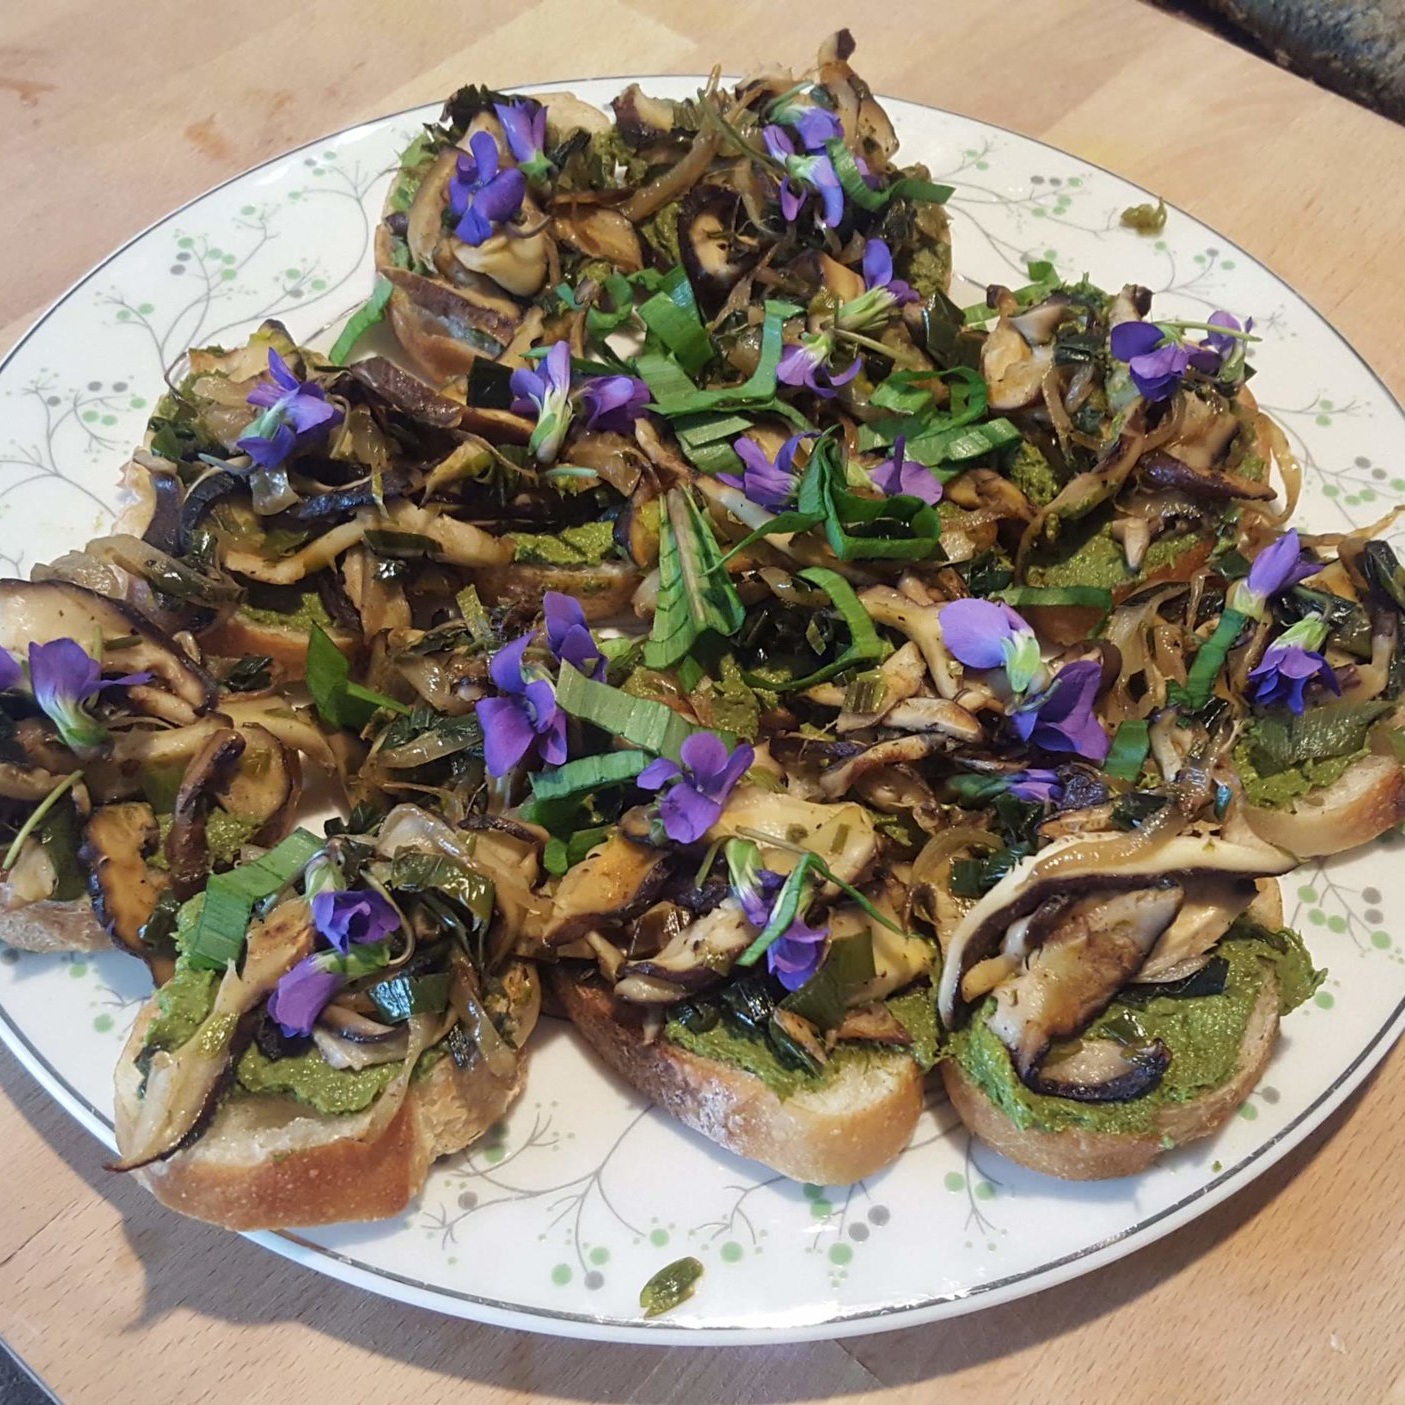
Bouquet of broccoli flower, chive flower, and lemon balm
Late May to early June is a transition period in the garden. We’re replacing bitter spinach with baby squash and planting tomatoes in the holes left by harvested head lettuces.
We don’t pull out Spring crops just to make room for Summer crops; many greens and brassicas (generally, the plants whose leaves we eat) will “bolt,” or flower, rendering their flavors bitter and their textures tough. You can spot the beginnings of bolting on most plants when the leaves begin to elongate and the plant begins growing tall rather than leafy. In the rosettes, or on the top of the stem, you’ll see a bud forming. You may be able to delay the process of bolting by removing the shoot, but for most crops, once it’s begun it can’t be reversed.
Bolting normally evokes groans from gardeners mourning the end of tender greens til Fall - but bolting isn’t all bad! Most crops send up tight clusters of small flowers whose close proximity makes them favorites of pollinators. These flowers also add pops of bright color to your garden and, in many cases, are edible! For example, kale or broccoli flowers are just as pleasant in a vase as they are on a plate, sautéed with garlic and a squeeze of lemon. The petals of chive flowers add a subtle onion flavor and act a beautiful garnish when sprinkled on top of pasta or fish. The peppery Arugula flowers lend themselves well to salads or scrambled eggs, and basil flowers can be used to make infused oils for salad dressings, dainty dessert toppings, or fragrant centerpiece bouquets!
So go ahead and take out your bolted plants when you’re ready to put in new crops, but enjoy the flowers while they’re there!
Tomato Tips

Nothing says Summer quite like the fragrant smell and succulent flavors of the tomato. Friends, family, and clients have been asking about it for months and it’s almost here - tomato season. While getting our plants in the ground, we collected some basic tomato tips to share with you.
As with planting all seedlings, it’s important to start with healthy plants. Wherever you buy your tomato plants, check the seedlings for signs of pests or diseases: discolored foliage, spotted leaves, holes, and dried up branches are all symptoms of an unhealthy plant.
When you get your tomato seedling to your garden, it’s essential to find the right spot for it. Tomatoes thrive in full sun and they’re prone to diseases that occur in damp conditions, so good drainage and air flow are a must. Caging, staking, or tying up your tomato will help increase air flow around the plant and will expose fruits for easy harvest.
Tomatoes are one of the only crops that should be planted deep. Snapping off any leaves that might get buried, plant up to ⅓ of the tomato stem. New roots will grow along the buried stem and will provide a more robust root system for feeding and support.
Because tomatoes are so sensitive to damp conditions, observing proper watering technique is especially important. Avoid overhead watering by watering the base of the plant rather than the leaves. It’s best to water in the morning so that any excess moisture can evaporate during the day rather than sitting on the plant overnight.
Once your tomato is established, it will start to grow fast. Pruning will keep growth in check, encourage airflow, and produce a more flavorful crop. When pruning tomatoes, look in the joints of the main stem and primary branches for side growth. These branches are called “suckers” and can be removed with pruners or shears.
Harvest tomatoes when they are plump but have some give and when their color has fully changed. They should come off of the vine easily with a twist. Store deep ridged heirloom varieties upside down to discourage pooling moisture and rot.
Chickweed Pesto
Last month, our team celebrated the Spring season by getting out of the garden and learning about edible wild plants! Our operations manager, Brody, invited us to visit his property and learn about the abundance of food growing there (both cultivated and wild). Among the “weeds”, we found chickweed, nettles, watercress, garlic-mustard, and violets - all of which are edible and have unique, delicious flavors. We enjoyed the medley of greens sautéed with some of Brody’s home grown Shiitakes and he graciously supplemented the bounty we collected with some chickweed pesto that he had made a few days earlier.
We loved the pesto so much that we thought we’d share it here - so go grab a few handfuls of chickweed from the backyard (or woods, or farmers market) and let’s get cooking!
Ingredients
1/2 cup walnuts, cashews, or pine nuts
2-3 cloves garlic minced
3 cups chickweed loosely packed
1 Tbsp lemon juice
1/2 cup extra virgin olive oil
1/2 tsp salt
1/4 tsp freshly ground black pepper
1/4 cup freshly grated Parmesan cheese
Instructions
Place all ingredients into a food processor and process until smooth. (A blender can be used instead, but the chickweed should be finely chopped first)
If it's too thick, slowly drizzle in a bit more olive oil.
Keep refrigerated. Eat or freeze within 3-4 days.
This recipe is courtesy of www.growforagecookferment.com
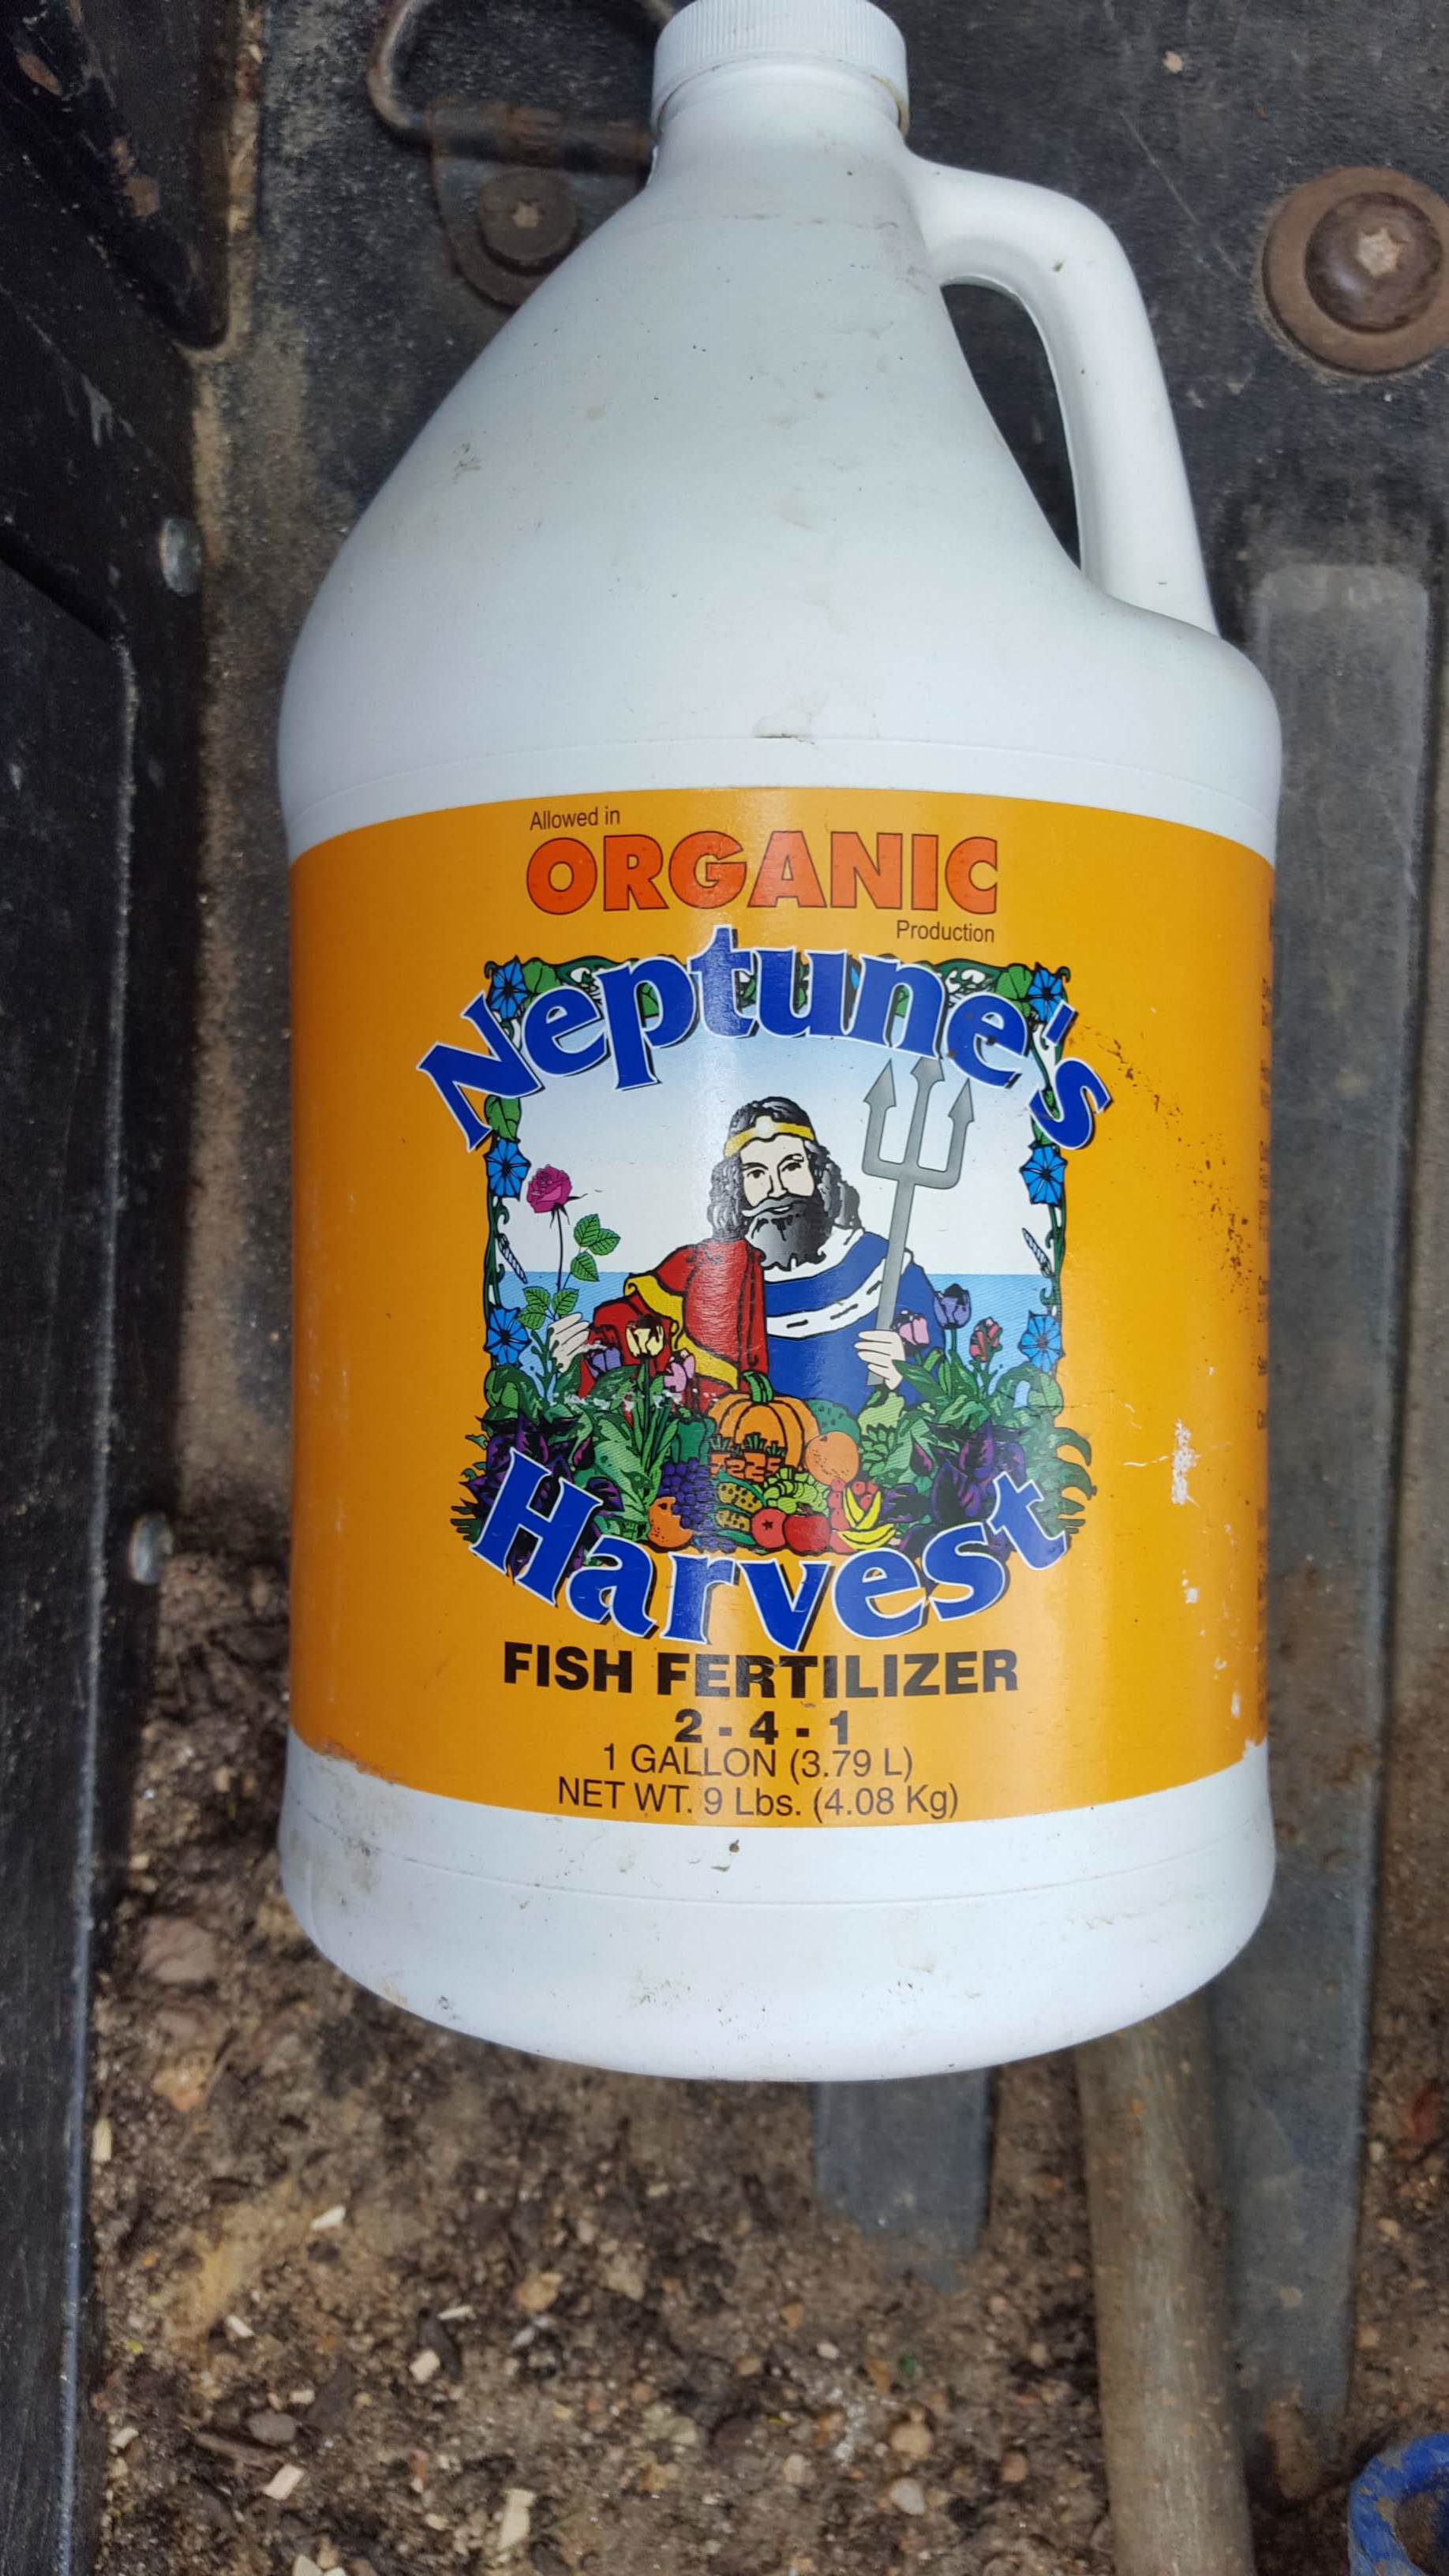
Fish Emulsion
The sense of accomplishment after getting all of the Spring plants in the ground is hard to beat. It’s a beautiful sight: the vibrant greens and purples of the lettuce leaves, the tiny curly-qs of the pea shoots, the bright pink stems of the radishes about to bulb up. But after a few weeks, those colors might have faded and your plants might not looks so fresh. What’s a gardener to do?
To keep our plants healthy and growing with vigor all season long, we use a product called fish emulsion. Fish emulsion is made of ground and fermented by-products from the seafood industry. Much like the rice hulls we wrote about last month, fish emulsion is made of materials that would otherwise go to waste.
High in ready to use nitrogen and other nutrients, this organic fertilizer gives our seedlings an extra boost. You can read the general nutrient break-down of fish emulsion and other fertilizers by the N-P-K number. The N-P-K number provides the percentage by weight of nitrogen to phosphorus to potassium, the three major nutrients required for plant growth.
We apply this fast acting, liquid fertilizer to all of our transplants to help them acclimate to their new homes and help them grow quickly early in the season. We may apply a second helping a few weeks later to plants that look a little droopy due to insufficient watering or nutrients. We also focus particularly on plants in the Brassica family, such as kale, cabbage, and broccoli, which can be heavy feeders.
So how can you use fish emulsion at home? Most garden centers will carry a few brands of fish emulsion or fish fertilizer; these will be heavily concentrated and will need to be diluted. In a sprayer or watering can, add two to three tablespoons of fertilizer for each gallon of water (double check the instructions on the label as it will vary depending on brand, nutrients, and concentration). The resulting mixture should look a little murky but should not be thick. You can apply fish emulsion by watering the plants with the mixture as you would normally, or by spraying it over the leaves as you would with a foliar fertilizer. Applying fish emulsion can be a bit smelly, but there are products that have been “deodorized” with wintergreen or lavender. We recommend trying these out if you want to apply fish emulsion on your houseplants indoors!
Pawpaw Pollination
As the largest native fruit in our region, Pawpaws are favorites in our edible landscaping. They can handle cold Winter temperatures and shady lighting, and they have relatively few pests.
Read moreRamping up for Spring
Ramps, or Wild Leeks, are wild edible plants in the allium family. Growing natively in the Appalachian mountains from Canada to North Carolina, ramps only appear for a few weeks before going to seed and disappearing for the Summer. As the first green to appear in early Spring, ramps have historically been celebrated as a sign of Spring and a tonic to the traditional Appalachian meat-heavy Winter diet.
Read moreRice Hulls
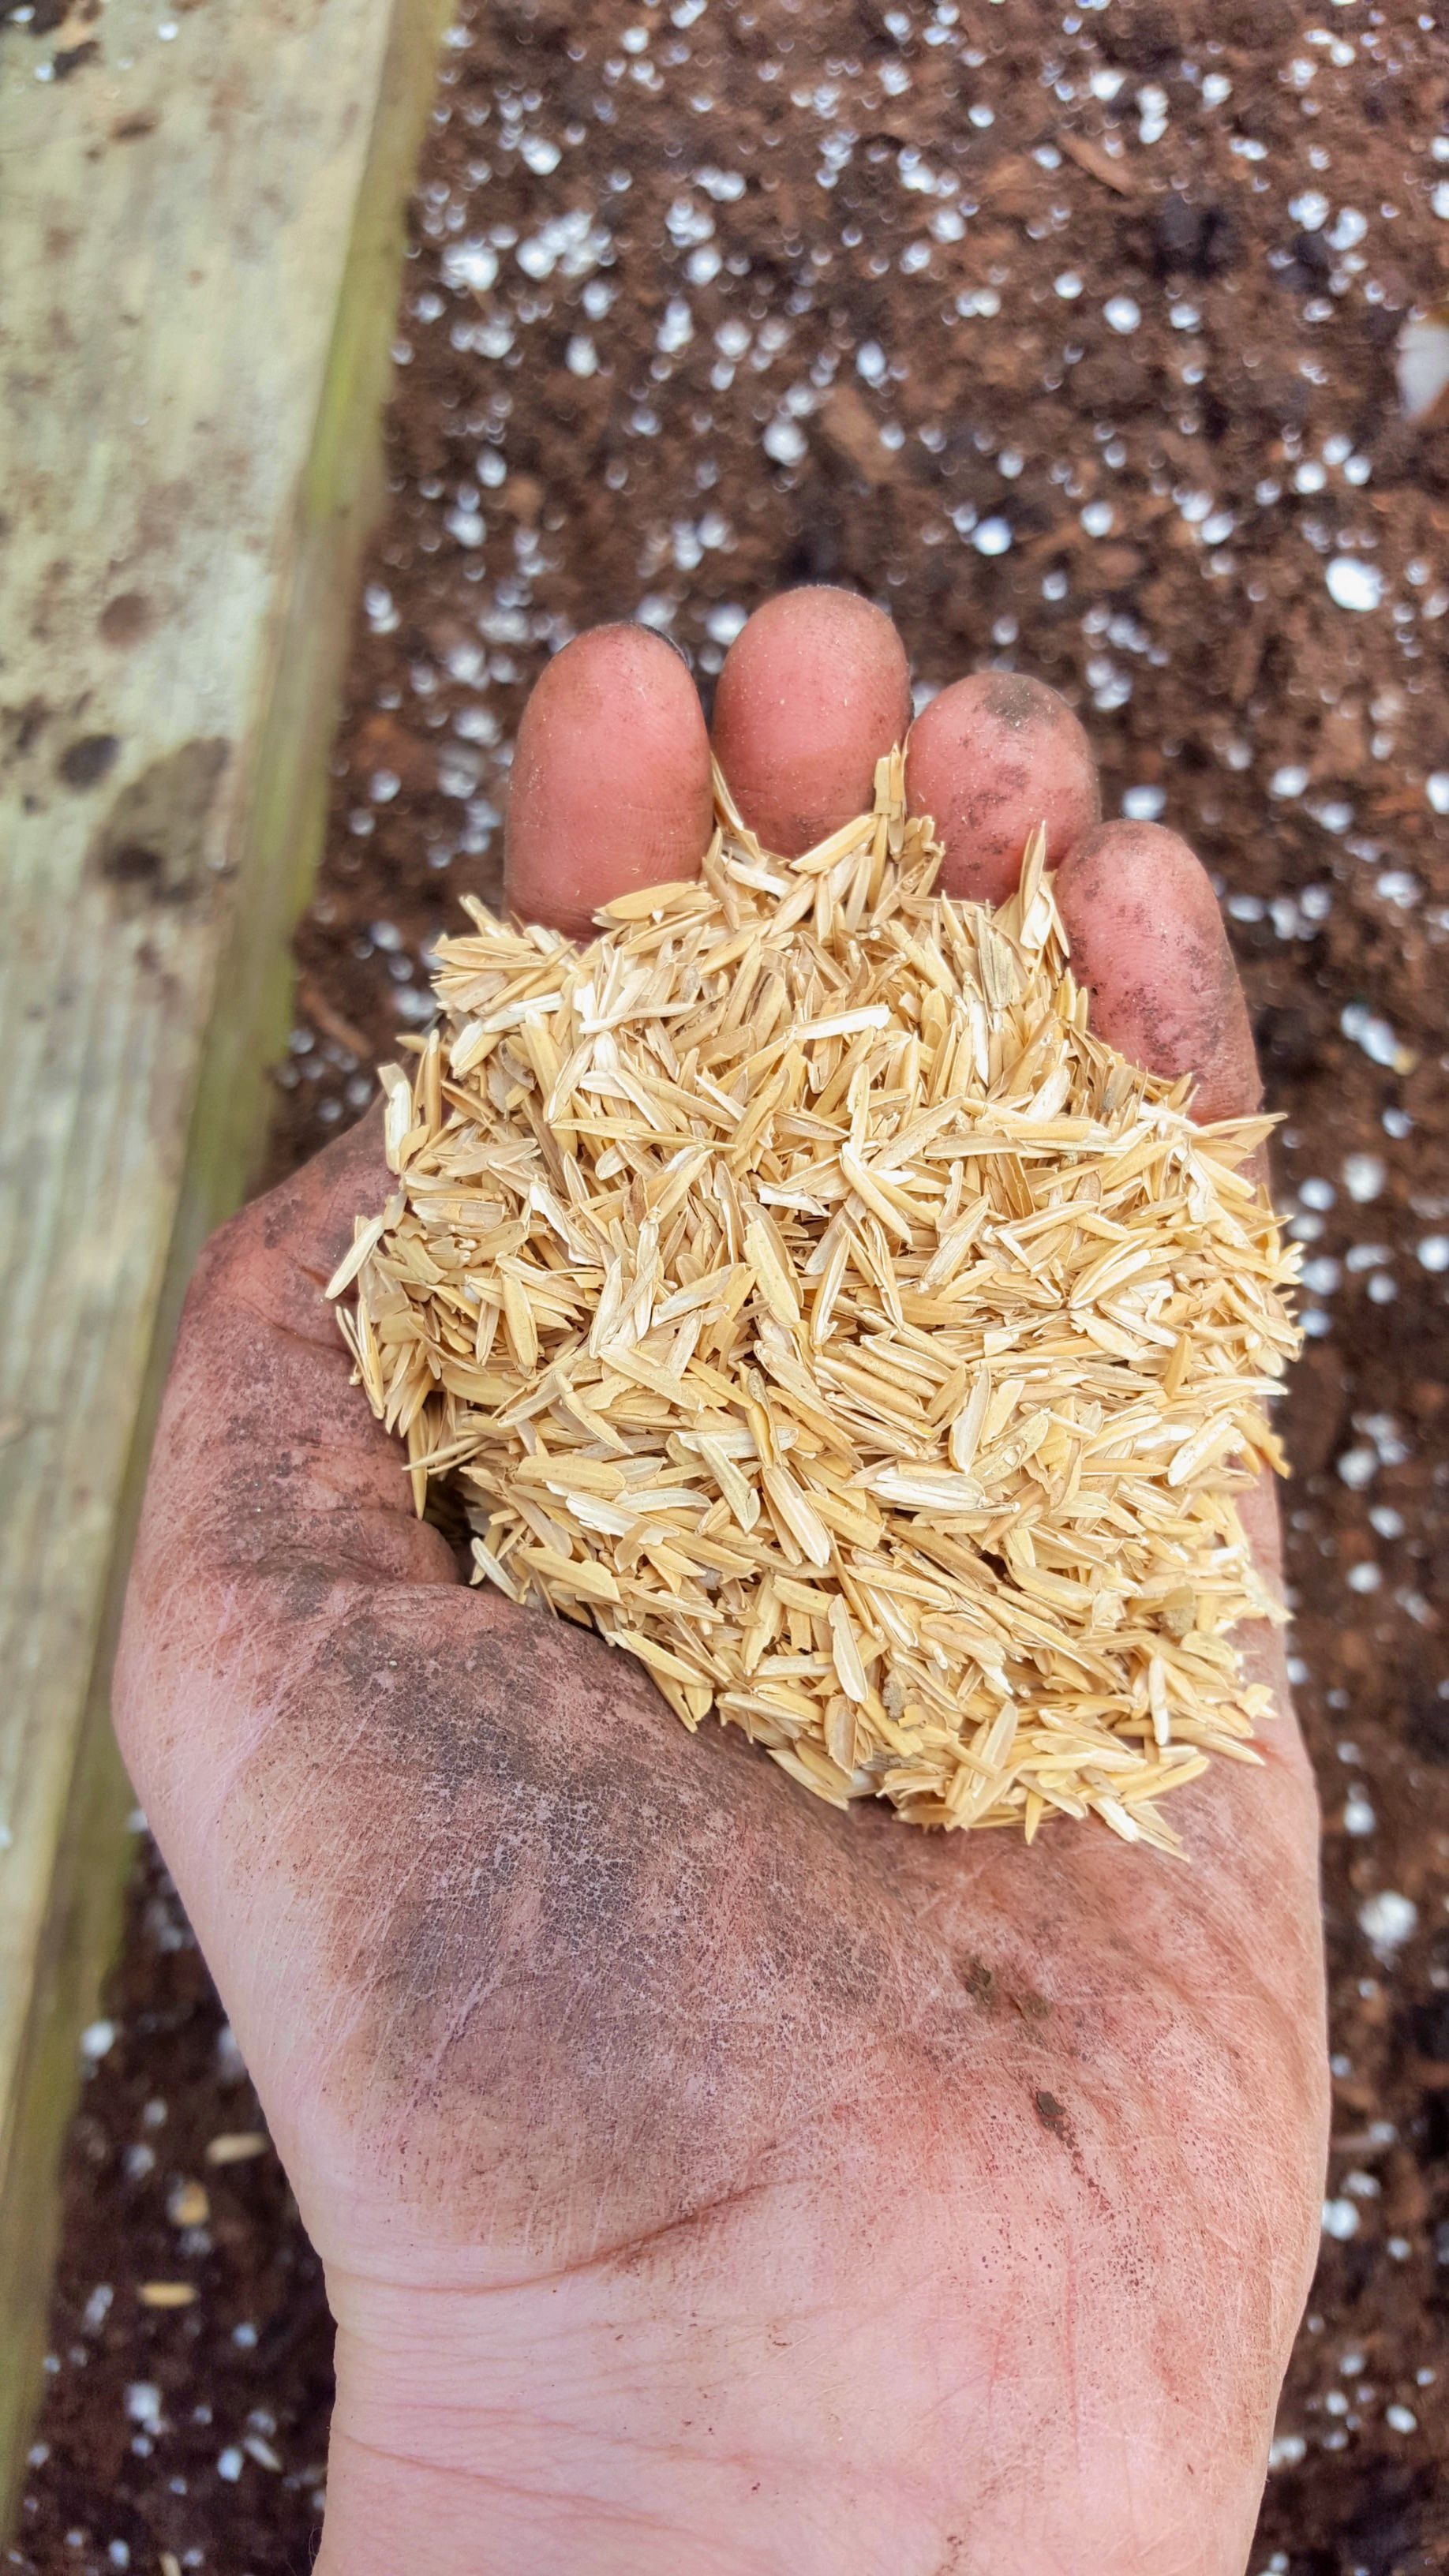
At Edible Eden, we spend a lot of time thinking about the larger impact of our work - we try to always choose the most responsible selection of plants, materials, and garden amendments that we can.
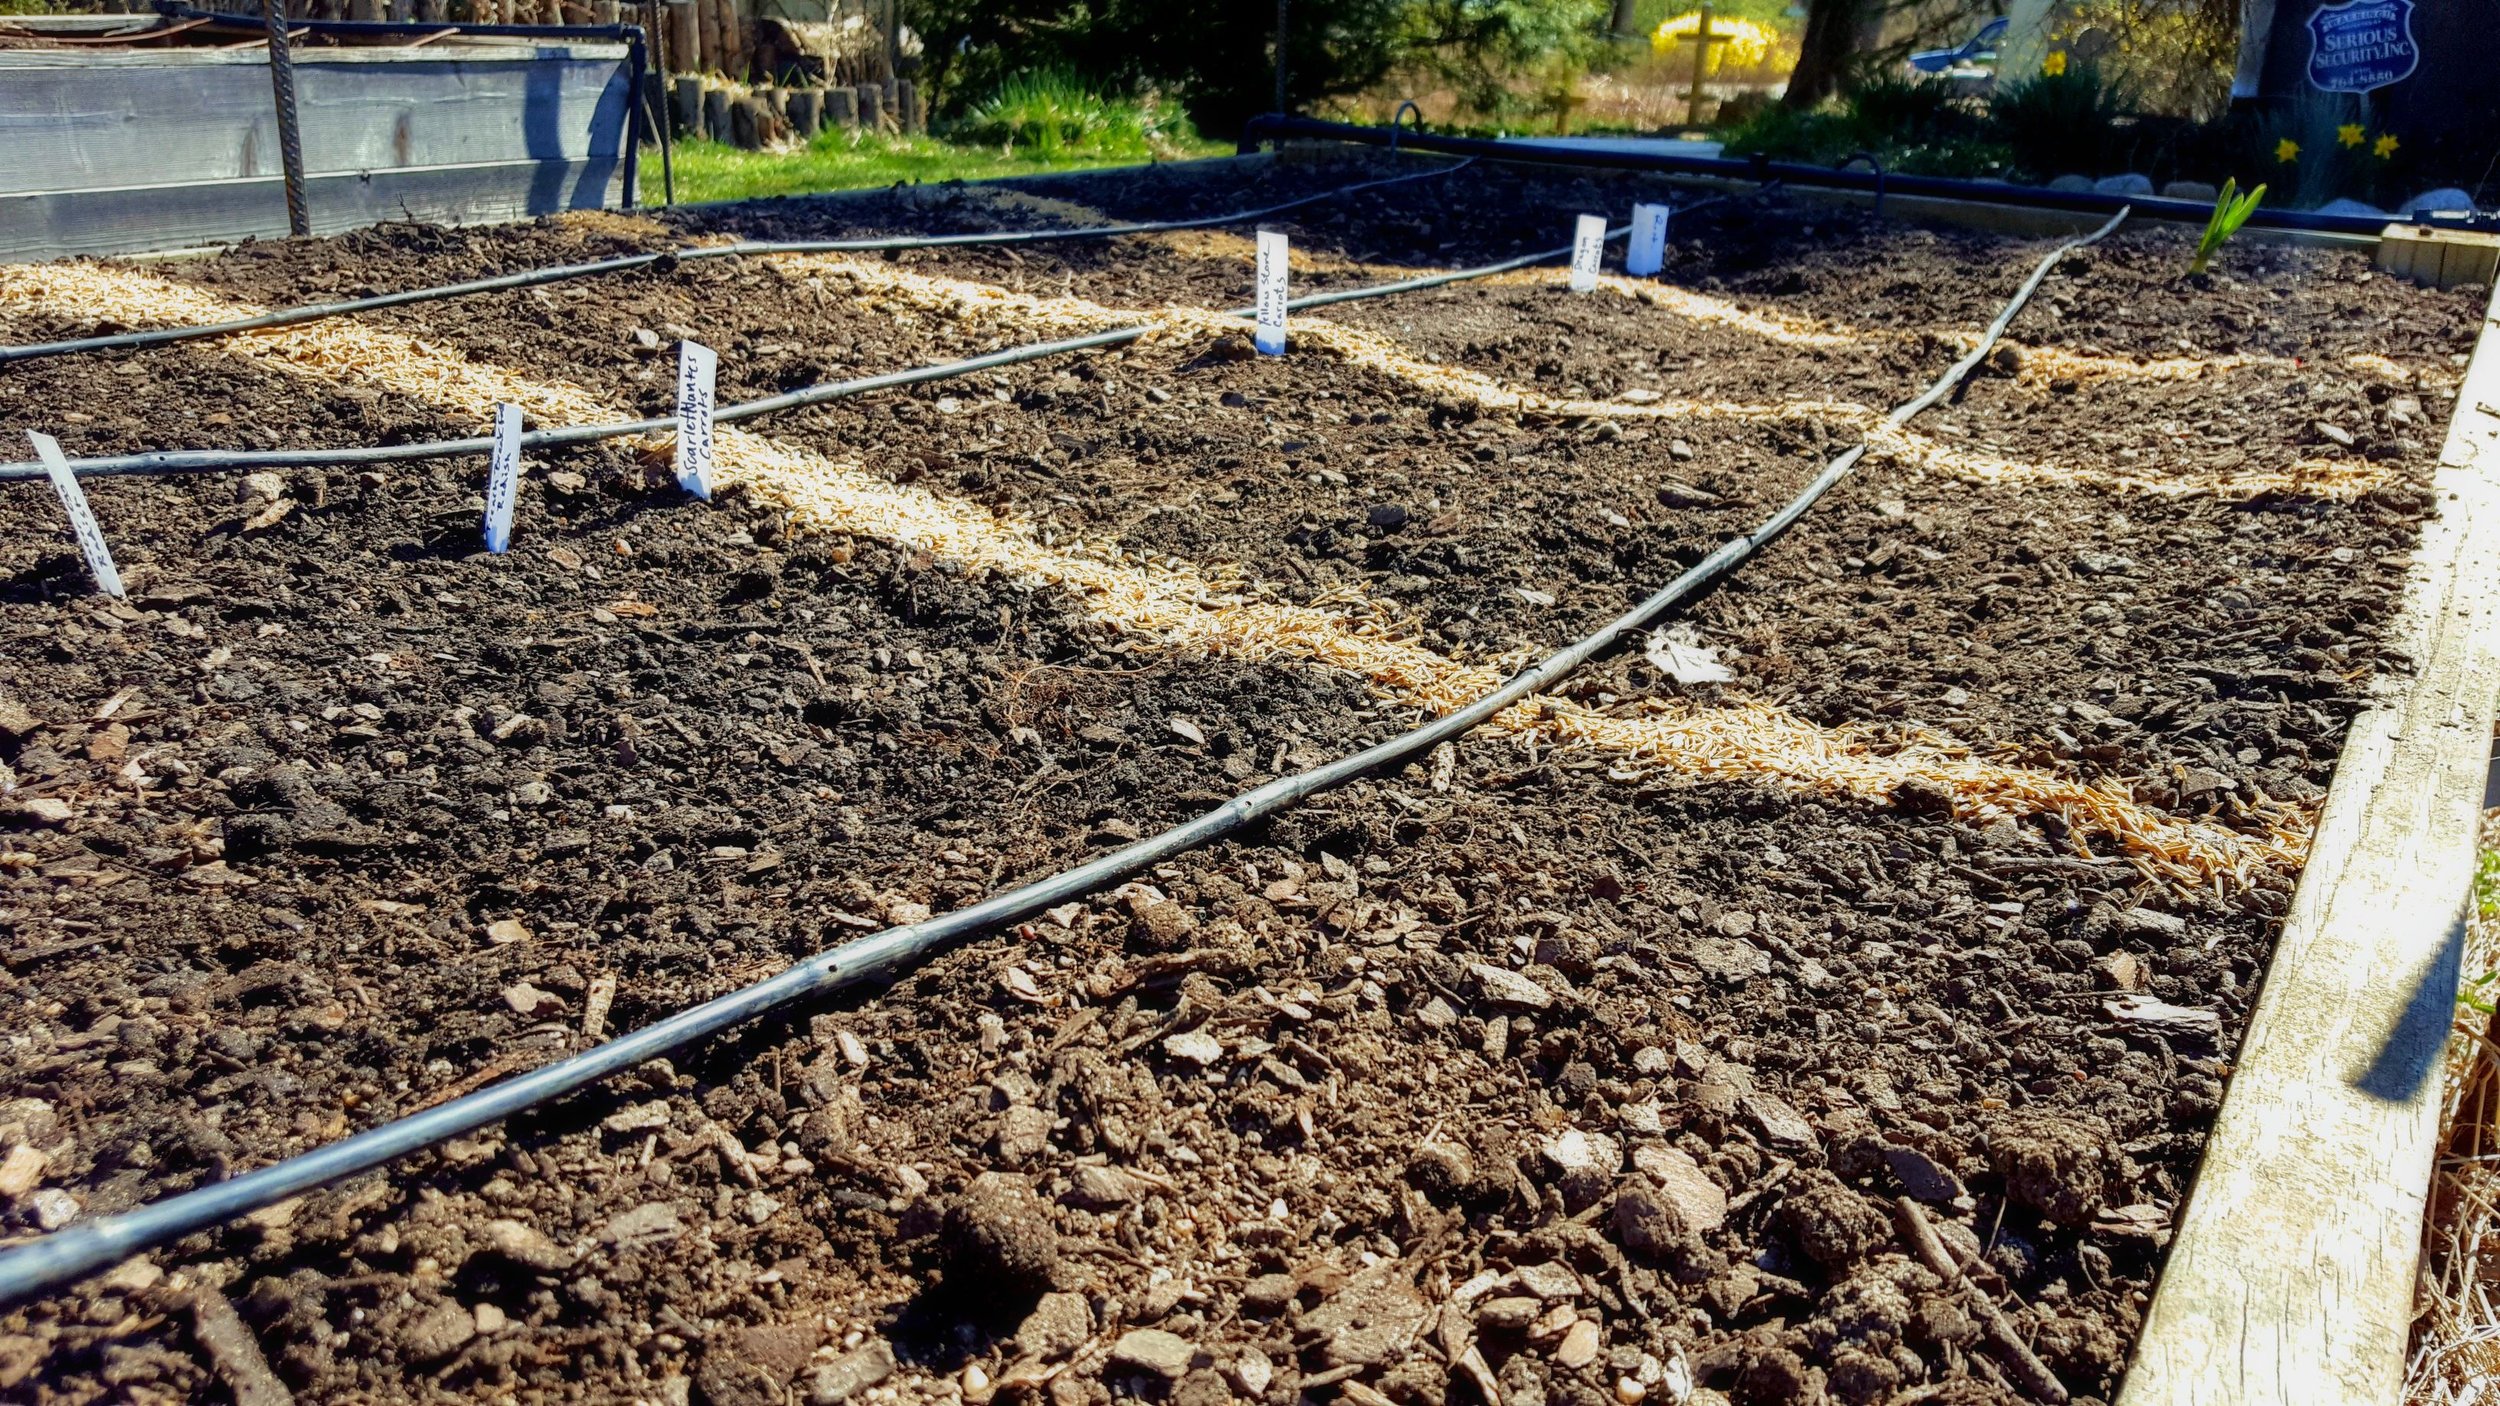
One eco-friendly material we love is rice hull! Rice hulls are the the husks around rice grains that are removed in processing. The hulls are then par-boiled to sterilize any rice grains and ensure no diseases are spread. We often use rice hulls to aerate, improve drainage, and retain water in our soils. Unlike the commonly used perlite and vermiculite, rice hulls are renewable resources. They do not have to be mined and no land is disrupted in their production: they would otherwise be considered a waste product! Unlike those other products, rice hulls are also organic material so they break down and add new nutrients to the soil over time. Because of this, you must refresh your beds with new hulls every year.
Rice hulls can also be used as a mulch much like straw or leaves. Use them to retain warmth or moisture in a bed or keep delicate seeds in place; we just topped our freshly planted carrot seeds with rice hulls to keep them from blowing away and provide good germinating conditions without burying them too deep.
Have you tried using rice hulls in your garden? Let us know what you think!
Garden to Table Recipe
Simple Roasted Vegetables
3-5 Fennel bulbs, trimmed and sliced into 1 inch slices.
1 large Celeriac, peeled and sliced into 1/4 inch slices
2-3 turnips, peeled and sliced
Broccoli broken into flowerettes
Olive oil
Salt and pepper
Never underestimate the ability of a little bit of olive oil, salt and pepper and 45 minutes or so in a hot over to transform lesser known (or loved) vegetables into something you will need to beat the kids off with a rolling pin if there are to be any left for dinner!
Some of my favorites are fennel, celeriac and turnips as well as old stand bys like broccoli and cauliflower.
Preheat over to 425. Cut your vegetables into distinctive bite size pieces, put in a bowl and drizzle with olive oil, Salt and pepper. Toss to coat. Arrange on a sheet tray. Bake for 30-45 minutes, depending on the vegetable, until crispy around the edges and soft in the middle. Fennel in particular takes a good long while to turn all soft and caramelized but believe me…it’s worth the wait.
To finish it off, sprinkle with parmesan cheese and bake for an additional 10 minutes. Serve with meat, fish, tofu, or anything else you can think of.

Fall Garden Tip
Fall Garden Tip
As the growing season comes to an end, here at Edible Eden we are putting the gardens in our care to bed for the winter. We start by pulling out all the spent (or mostly finished) crops. Plants that carry heavy disease loads like tomatoes and squash should not be put into the compost pile. Either let them decompose somewhere away from your garden, put them in with chickens or other livestock or even (sigh) put them in the garbage. There are just too many disease spores and pests that can contaminate your home compost.
Then we take down and store trellis materials, work compost into the beds, plant garlic, and cover it with straw mulch.
In some in-ground gardens we also sow cover crop seed. I tend to opt for cover crops for in-ground gardens as opposed to raised beds as I find it’s difficult to chop them up and till them in in a raised bed context in the spring time. Cover crops prevent more invasive weeds from taking root and some (like vetch or winter peas) will fix nitrogen in the soil, adding fertility for next spring. The trick is that you have to chop them up with a flail mower or scythe and till them into the soil a few weeks before planting if you are to get the most out of them.
A good place to start is with Austrian Winter Peas. While the pea itself is not edible, both the tender pea shoots and the flowers are delicious and an added benefit to using the plant as a cover crop.

You've Got Kale!
We are happy to share an article written by Farmer Josh was recently published in JMore magazine. Check out what he has to say about fall gardening!

DIY Lavender Vanilla Sugar Scrub!
DIY Lavender Vanilla Sugar Scrub

As much as we talk about growing healthy food for the body, we can also use the herbs and foods we grow for the skin. The herbs you grow in your garden - lavender, lemongrass, thyme - have fantastic relaxing and nourishing qualities that work well in skin care formulas.
There are endless possibilities in the world of home made beauty products, but here we’ll highlight just one, a personal favorite: the simple yet decadent Lavender Vanilla Sugar Scrub.
Mix together:
-¼ cup brown sugar
-¼ cup white sugar
-1.5 tbs oil (coconut, cocoa butter, sweet almond, olive oil, avocado oil are all good options)
-5-10 drops lavender essential oil
-¼ tsp vanilla extract
You can add additional exfoliants from your garden such as lavender leaves and seeds, borage, evening primrose, cleome flower seeds, and more!
Interested in making more natural beauty products? Try one of our Eco Spa classes at the Station North Tool Library, where we’ll make 3 different natural recipes for you to take home. Class schedule here: http://www.stationnorthtoollibrary.org/classes-1/
Sweet Sweet Serviceberry Jam

Serviceberry jam is a beautiful deep red color.
A fruit of many names, the serviceberry is also referred to as the juneberry, saskatoonberry, sarvisberry, shadberry, wild plum, or sugarplum plant. In mid-June (...right around now!) they begin to ripen, turning dark red or purple, and can be picked right off the branch to eat or preserve.
Read more